In this blog, we will be learning about how to get SharePoint search results using the Rest API through PowerAutomate flow. The search results will be exported into a CSV file and saved into a SharePoint library.
Create Flow
1). Sign in to Power Automate
2). Open the flow, click on the Create option, and select "Instant Cloud Flow".
Enter Flow name.
Choose the flow trigger as "Manually trigger a flow".
Click on the Create button.


3). Add an action "Send an HTTP request to SharePoint".

| Site Address | |
|---|---|
| Method | |
| Uri | |
| Headers |
|
4). Add an action "Parse JSON" and enter output of previous step in Content.
In the Schema field use the below JSON content.

| Parse JSON - Schema |
|---|
Add additional type null - this will take care of the null values coming in search results.

5). Initialize variables one of type Object and Array.

6). Add "Apply to each" loop for rows and enter step 4 output (or enter below) as input value.
body('ParseJSONtoGetRows')['PrimaryQueryResult']['RelevantResults']['Table']['Rows']
Add another nested "Apply to each" loop for cells and enter current cells value (or enter below) as input value.
items('Apply_to_each-Rows')['Cells']

7). Add a "Switch" condition and enter current cell key value (or enter below) as On value.
items('Apply_to_each-Cells')?['Key']

8). Add a case statement to fetch field value from the search property.
Enter search managed property Title in equals field.
Add an action "Compose" and add below value in the inputs parameter.
setProperty(variables('varResponseJson'),'Title',items('Apply_to_each-Cells')?['Value'])
Here, setProperty(object, property, value) function is used; it returns an object with a property set to the provided value.
Add an action "Set variable" (defined in step 5) object variable and enter previous step output as input value.
9). Add more case statements; we are fetching five field values from the search properties. Therefore, five case statements are needed.
Repeat the step 8 for all the required search managed property.
Note: Create search managed properties for your custom fields and use them.


10). Append the array variable (defined in step 5) and enter object variable output as value after closing on inner "Apply to each" loop.

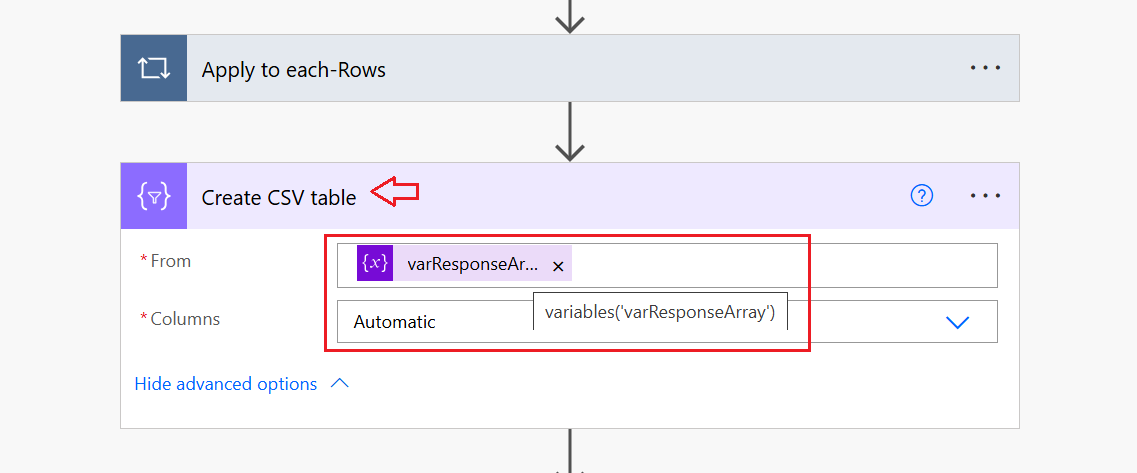
11). Add an action "Create CSV table" and enter array variable in From and Automatic in Columns.
12). Add an action "Create file" to create CSV file to export the search results.
Enter the Site Address and Folder Path as required.
File Name as concat('BlogData_', formatDateTime(utcNow(), 'yyyyMMdd_HHmmss'), '.csv')
File Content as output from previous step 12.

I hope this will help all of you! 🧲
Feel free to provide feedback.
🚀 "Happy Coding" 🚀
No comments:
Post a Comment